Are you looking for an alternative to the Pretty Links plugin? If yes, then “ClickWhale” is one of the excellent options for that. Many of you may be worried about using this plugin because this is the new plugin in the market. So, I want to make you worry-free and tell you that this plugin is built by the AAWP team who has built the AAWP WordPress Plugin for Amazon Affiliates. I hope that, now you are worried free to use this brand new plugin on your WordPress website/blog.
Okay, let’s talk about this ClickWhale plugin in detail such as its functionality, pricing, and why you should use this plugin. So, if you are interested to know about this plugin’s interesting features then keep reading this article till the end. Let’s get started.
ClickWhale Review: #1 Link Shortener Plugin For WordPress
ClickWhale is an excellent WordPress link shortener plugin that offer you to manage your affiliate & internal links, create & customize link pages, in-built tracking code support, and detailed statistics of your links.
Let’s take a closer look at these features and talk about them in detail.
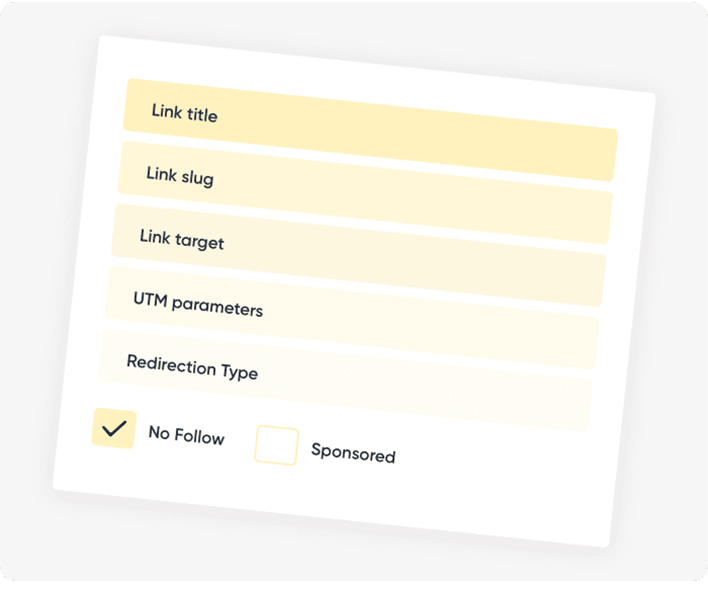
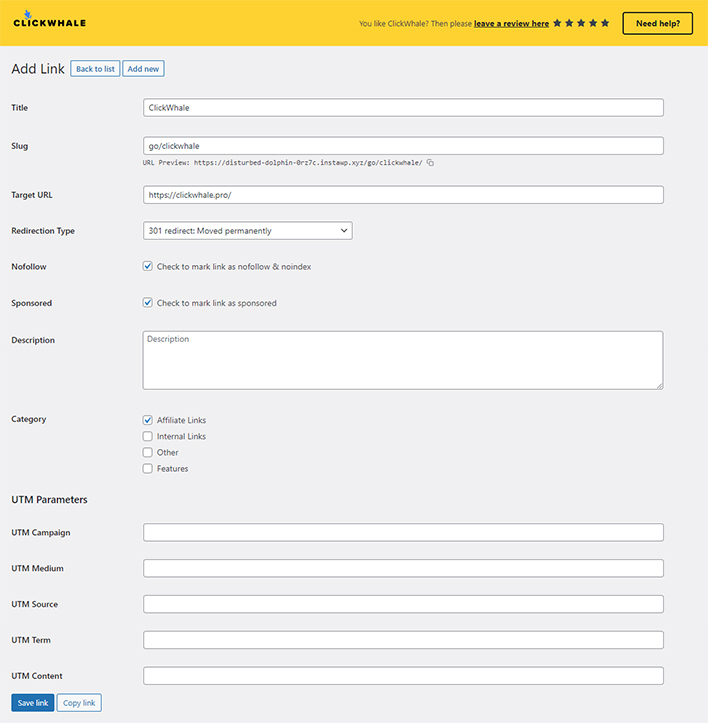
Link Shortening
Like other link shortener plugins, this ClickWhale plugin also gives you the same option for link shortening. Such as it offers you to add Title, Slug, Target URL, Redirection Type, Nofollow, Sponsored, Description, Category, and UTM Parameters. So, here you need to simply put all the details according to your needs and you can make your long affiliate or internal URL to shorten.
Key Features Of ClickWhale
Actually, the ClickWhale plugin comes with numerous features that help to manage links more efficiently and effectively. Some of its main features are as follows
1. Link Pages – Share your Content In An Easy & Powerful Way!
Link Pages is one of the best features of this ClickWhale plugin that you can’t get with any other link-shortner plugin. If you don’t know what is Link pages and what is the use of this then don’t worry. Here I’ll explain to you.
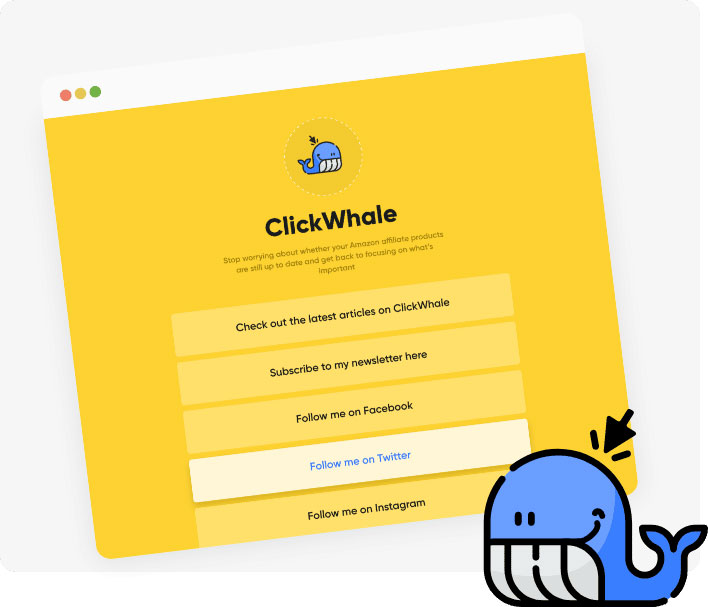
By using this feature you can create a unique link page for yourself by adding all your important links in one single place! just like the above image. And that single page link you can share on your social media profile and page to show your followers what you do on the internet.
You can easily create and customize the link pages with just drag and drop, this link page is very helpful for content creators, marketers, and business persons to sell their products and increase their profits.
One option that I liked the most under the Links Pages is its Blog Posts Feed option.
While creating a link page, under “Pro Blocks” there is an amazing option which is “Blog Posts Feed“. By using this, it will automatically display your latest blog posts on your link page to get more reach to your content. This is one of the easiest and best ways to get more attention from your audience for what you do online!
Now, many of you might be wondering how to create a link page. Well, don’t worry about that here I’ll share with you all the steps to create a link page.
How To Create A Link Page?
To create a link page, firstly you need to go to the ClickWhale -> Link Pages.
Once you click on that, a new page will open which looks like the below image. On that page, you can see there are five tabs such as Settings, Contents, Styles, SEO, and Social Profiles.
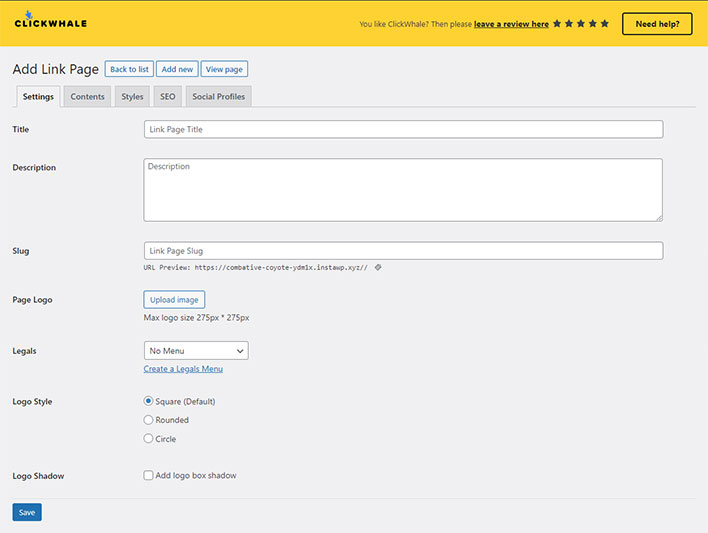
1. Settings:
On the Settings tab, you need to enter the Title, Description, Slug, Select the Menu in Legals, and Upload the Logo with the size of 275px * 275px.
2. Contents:
Right now, we’ll skip this tab. You may be wondering why am telling you this, so the reason is that, first we will fill up all the details of other tabs so that all that content will look and we can set the content design by drag and drop.
In this section, you’ll get numerous options to create a link page. That’s why when you are going to create a link page for yourself, first check all the options and then drag and drop the thing which you want to share with your audience.
In the below image, you can see how to set the link page by just drag and drop.
3. Styles:
Here in this tab, you’ll get the color options for Page Text Color, Site Page Background Color, Links Background, and Text Color so that you can customize and match them with your website color.

4. SEO:
This option is similar to the SEO plugin which allows you to add SEO Title, SEO Description, Robots Meta, and Open Graph options, which helps to improve the visibility of your website in search engine.
5. Social Profiles:
First of all, I want to tell you that this option is available in the Pro version only. Here they have provided to add links of your social media profile such as Facebook, Instagram, Twitter, TikTok, and YouTube.
2. Tracking Codes – Manage All Your Tracking Codes Easily
With the ClickWhale plugin, you can easily manage all your tracking code or code snippets on your website/blog without cutomising your website’s code.
The best thing about this feature is that it allows you to show this code on a specific page or whole website. Moreover, it also gives the option to add that code before the head tag or before/after the body tag. What’s more, you’ll also get the option to include/exclude the code from any of the pages, posts, and categories.
3. Statistics (PRO)
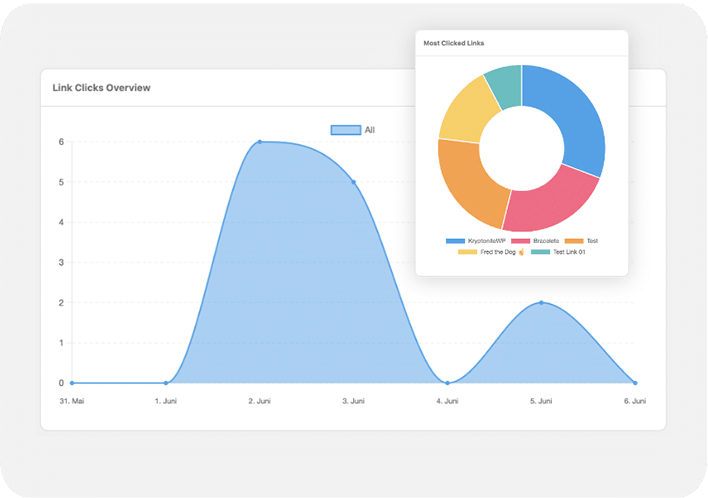
Well, this feature is available in the Pro version, so if you want to know how your links performing and get detailed data then you should go with its Pro plan.
Under the analytics dashboard, you’ll get the data on how each affiliate/internal links are performing through its clicks and conversions. After analyzing this data, you’ll get an idea of which links are performing at their best and which need to be improved.
So, with the help of this data, you can improve the one which is not performing well so that it can perform well and increase the clicks and conversion ratio.
4. Migration and Reset
Under the “Tools” section, this plugin gives you a few options such as Migrate, Reset, Import, and Export. Many of you might be thinking that this feature may be available in the Pro version right? So, for this you are wrong, ClickWhale offers you these options in their free version plugin.
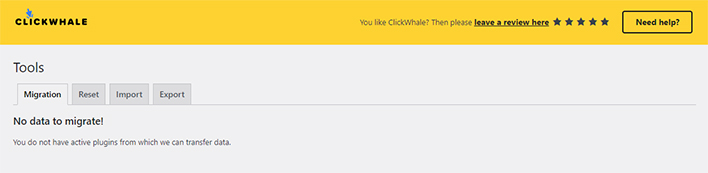
By offering these options, ClickWhale wins the game because you can’t get these options in the Pretty Links free version, or any other link shortener plugin.
Using the Migration option you can migrate your URLs and data from the other plugins. Which is very helpful, so you don’t need to worry about losing your previous plugin data. On top of that, you can also import the data from the other plugin by importing the CSV file under the Import tab. By offering this option ClickWhale has made this task very easier for you.
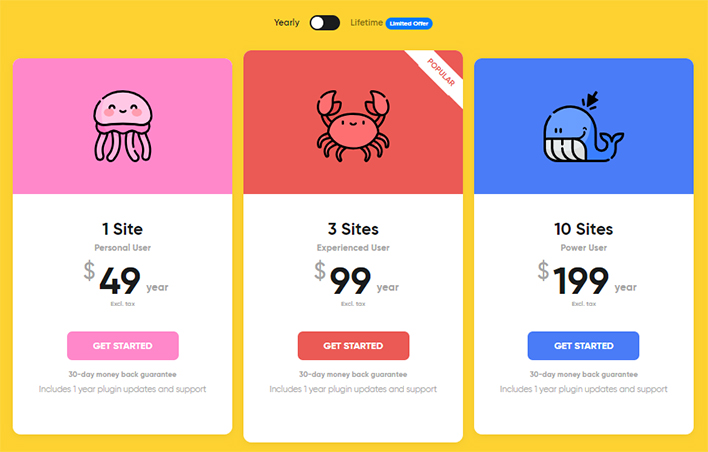
ClickWhale Pricing
Below is the pricing plan for this plugin, you can choose any of the plan which is suitable for you. If you are still unsure about purchasing then I suggest you to use the free version of this plugin and then make a decision.
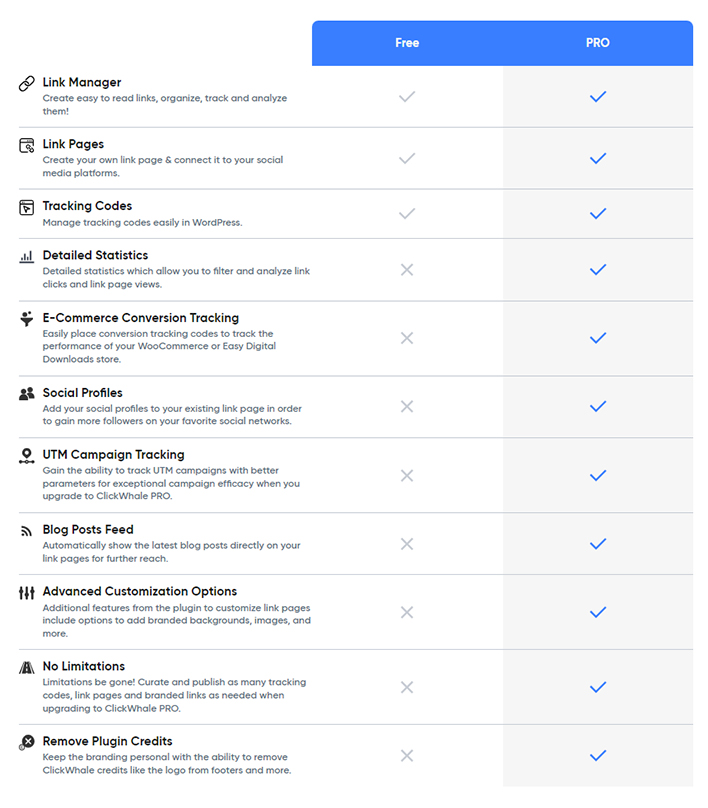
Why You Should Go With ClickWhale – Free vs Pro
Well, with the pro version, you’ll get more features and no limitation to add tracking codes and create link pages. On top of that, if you are doing E-commerce business then using this plugin you can track the performance of your WooCommerce products. So, to track your woocommerce products now you’ll no need to add any extra plugins.
By looking at the difference between Pro and Free in the below image you’ll get a clear idea why you should buy the pro version.
Final Thoughts
After using this plugin, I can say that ClickWhale is a perfect plugin for link management and analytics. The best part about this plugin is that the dashboard is user-friendly. So, both beginners and experienced WordPress users can easily use this plugin.
Well, if anyone doubts how it will work then I’ve already said that first try the Free Version. And once you are sure and want some advanced features like Statistics then go with the Pro Version.