As a WordPress user, you may know that every year WordPress releases a new WordPress theme with the name of that year to serve as its default theme. As we are into 2023, WordPress has already released its latest theme with the name of Twenty Twenty-Three, which we will discuss here in detail like how to use this theme, how to customize it, and many more things. So, stay with this article till the end.
This Twenty Twenty-Three theme is built with mainly two things to keep in mind and that is it should be lightweight and fast, which is one of the crucial things for any website in today’s scenario. Actually, this theme is simply a blank theme to create your next WordPress project from scratch with its built-in features and functionality.
Many of you might be thinking about what sets it apart from the previous year’s WordPress theme, am I right? Well, you’ll get all the answers here in this article and I will do my best to cover all the things.
Okay so now, let’s deep dive into the Twenty Twenty-Three theme’s features and functionality.
Twenty Twenty-Three WordPress Theme – Complete Customization Guide
Before we begin, I just want to tell you that since the WordPress Twenty Twenty-Two theme, WordPress has started to use Block Editor and stopped working uses of Classic Editor. Still, if you are not familiar with block editor then don’t worry here we will see that. Okay, so without wasting time let’s get started.
After activating the WordPress Twenty Twenty-Three theme, one of the differences you’ll notice in the Appearance tab that is you won’t get Widgets, Menus, and Theme File Editor options.

Now, another question might have come to your mind that is, how to add menus and widgets and also how to access the template files. Am I right? Well, don’t panic we will see all these things in this guide so keep reading this article.
How To Modify WordPress Twenty Twenty Three Theme
To access, edit, or modify WordPress Twenty Twenty-Three theme widgets, menus, and template files you need to go to the Editor under the Appearance tab.
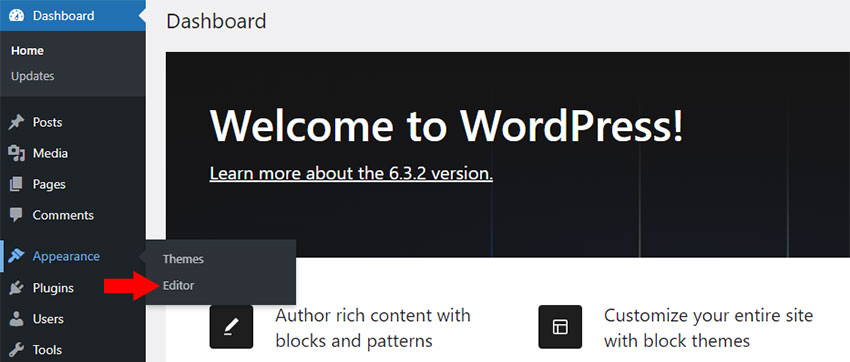
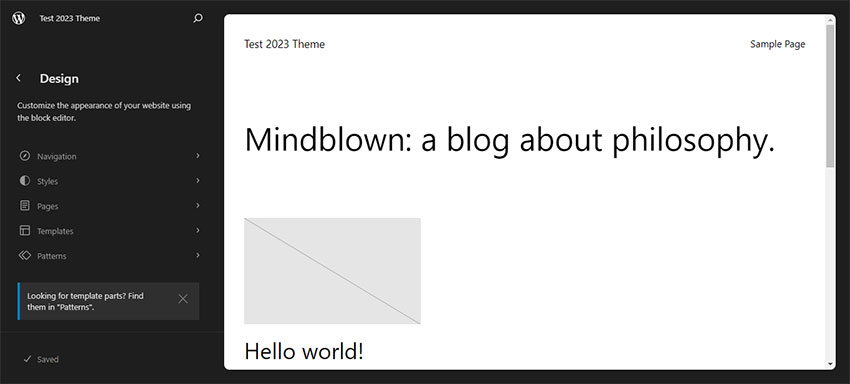
After clicking on that you’ll see a new editor backend where you’ll see the options to access Navigation, Styles, Pages, Templates, and Patterns.
Okay, so now we will explore all these options one by one.
1. Navigation – Add & Edit Menus
As you know to edit or modify the Navigation need to go to the Appearance -> Editor and then click on the Navigation. After clicking on the Navigation option click on the Edit icon or simply click on the page screen which I’ve mentioned in the image below.
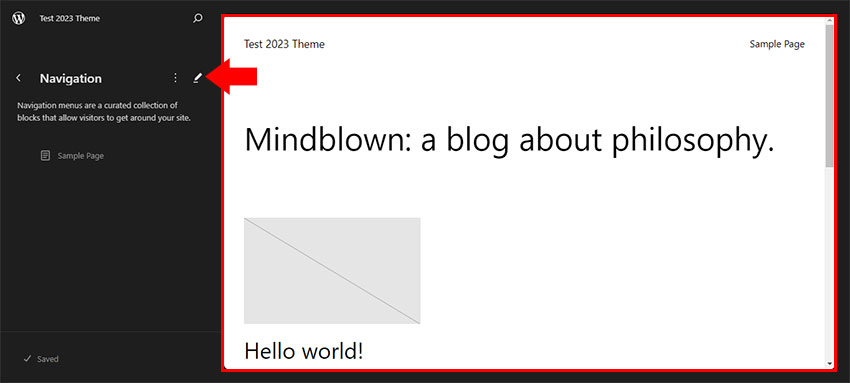
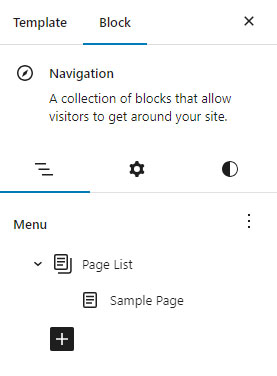
Once you click on the edit icon you’ll see the screen like the below image. To add a menu you need to click on the + icon and then choose which page you need to add or want to a custom link.
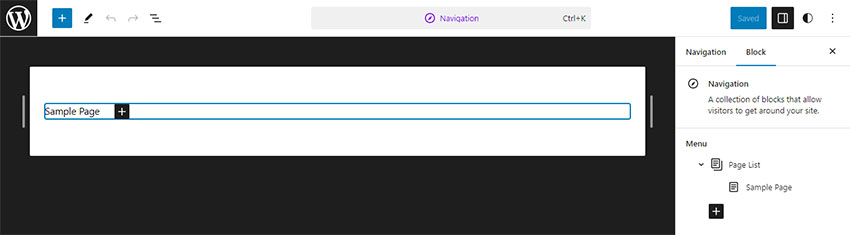
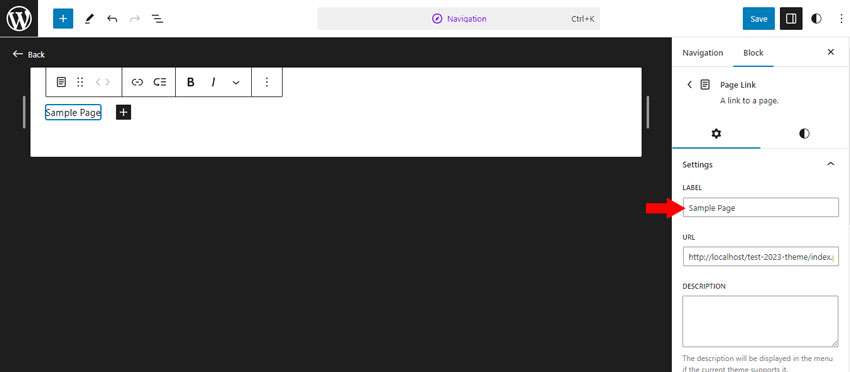
If you want to change the name of the Page that you have added to the menu then simply click on that link. For example, here I have a Sample Page in the navigation menu and if I want to change that name in the menu then I need to click on that, and the Settings box will appear on the right side where I’ll change that name under the Label.
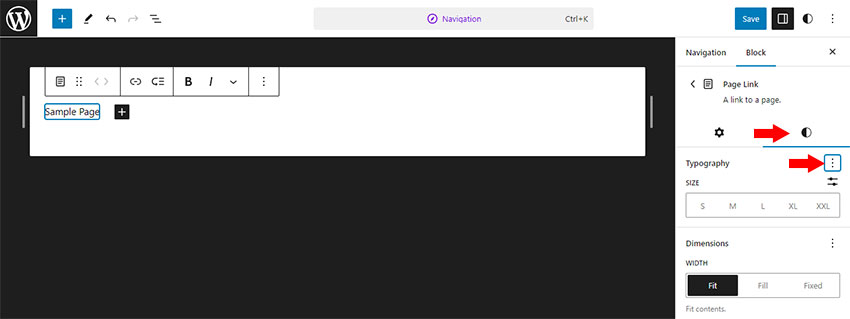
Apart from this, to change the Font Family, Font size, Line height, Letter spacing, etc., we can do that by simply clicking on the Styles tab which is beside the Setting tab.
Initially, you can’t see all the options, to enable that options click on the 3 dots under the Styles tab which you can see under the below image.
After going through this many of you might be wondering about how to customize the Menu/Navigation’s font color, background color, etc., then I want to tell you that we will see that later in this post, under the Patterns section. The reason is that, in the Navigation section, we can only add, edit, and modify the menu’s font only.
2. Styles – Customize Typography, Colors & Layout
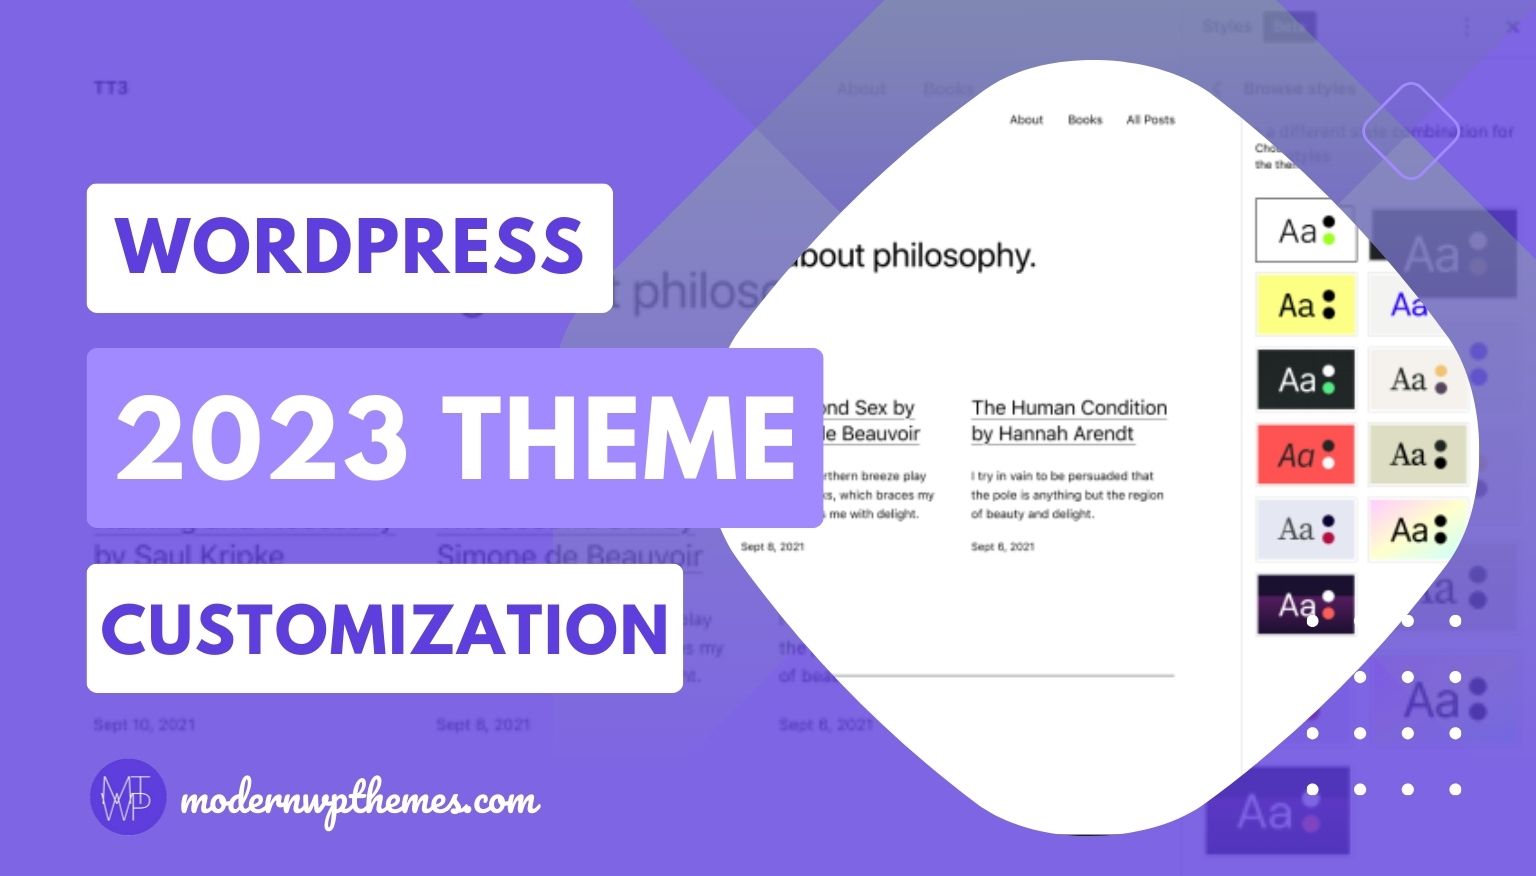
In the Styles section, you’ll get numerous options for customizing the Typography, Colors, and Layout. To go to the Styles you have to go to Appearance -> Editor -> Styles.
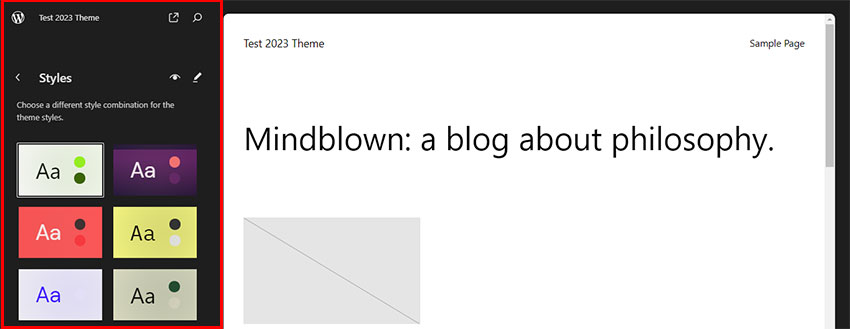
After clicking on the Styles you’ll see the screen like the below image. Here WordPress has provided a few default theme styles which you can check by clicking on them one by one.
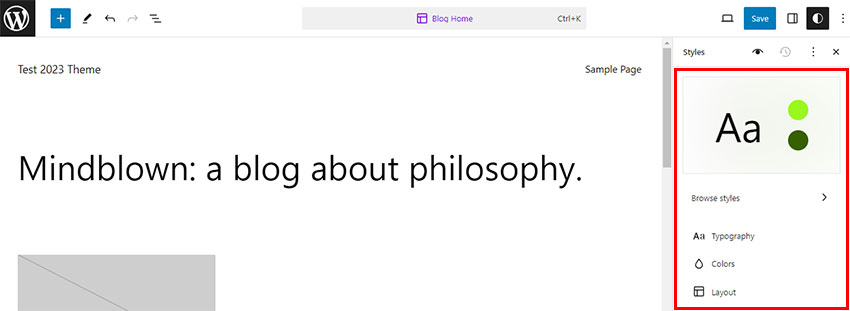
Once you choose the one from Styles options then click on the Edit icon or on the white screen to see more customization options. Here I have chosen the default style.

After clicking on that, a new screen will appear where you’ll see the options for customizing Typography, Colors, and Layout. Still, if you want to change the Style then you can do that from here by clicking on the Browse styles.
1. Typography
We have already seen the Styles, that’s why we’ll move towards the Typography. To see what option you’ll get for Typography you need to click on that. After clicking on it, you’ll see the options for customizing Text, Links, Headings, Captions, and Buttons.
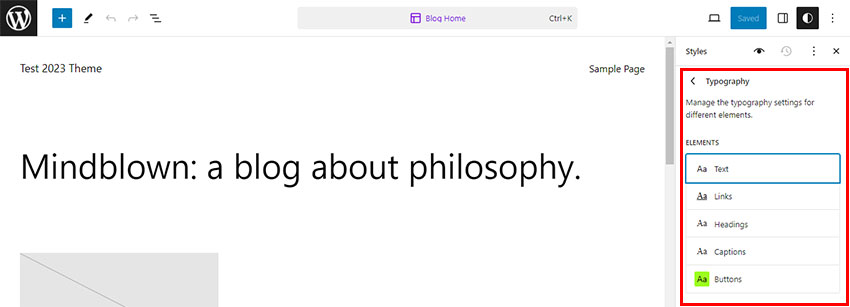
1. Text
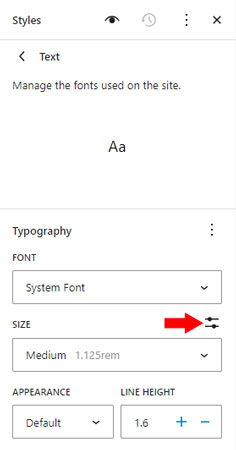
Under the Typography, you can change the Font Family, Font Size, Appearance, and Line Height for the overall site’s paragraph text.
With this theme, you’ll get 5 font family options which are DM Sans, IBM Plex Mono, Inter, System Font, and Source Serif Pro.
Moreover, the font size is set as Small, Medium, Large, and Extra large. If the given font size does not suit your design then you can add a custom size for that by clicking on the icon which you can see in the image below.
Many of you might be wondering how to add custom fonts in this WordPress Twenty Twenty-Three theme or is this possible to add custom fonts? Well, the answer to this question is we can add custom fonts to this theme by using Create Block Theme plugin, which is the official plugin created by WordPress.
Okay, so get back to the topic and see how to add a custom font. Firstly, you have to add the Create Block Theme plugin, once the plugin is installed and activated you can see the options of this plugin under the Appearance tab such as Create Block Theme and Manage Theme Fonts.
Now, you have to click on the Manage Theme Fonts option and you’ll see the screen like the below image.
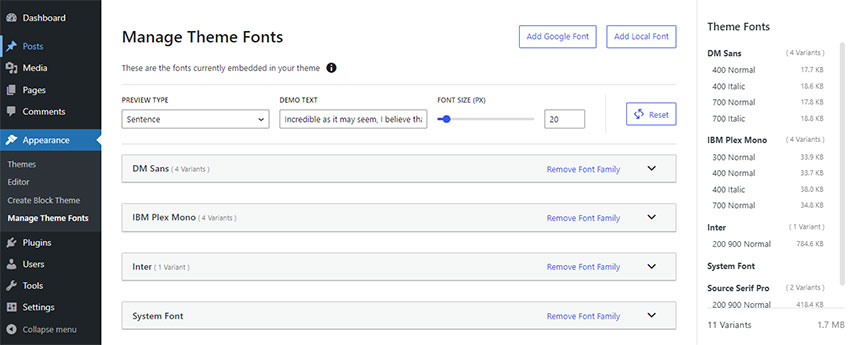
As you can see in the above image, there are two options which are Add Google Font and Add Local Font. So, you have to choose the option according to your needs, and this is one of the easiest methods to add a font to this theme.
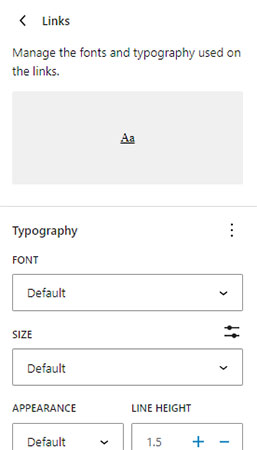
2. Links
When it comes to the links, here you’ll get the option to choose Font Family, Font Size, Appearance, Line Height, and Decoration for the overall site’s anchor text links.
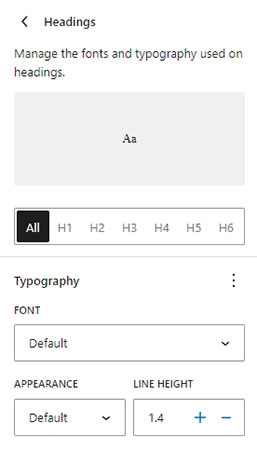
3. Headings
Under the Headings tab, they allow you to customize all the headings or simply customize each one separately. To customize all the headings under All, they allow you to change the Font Family, Appearance, Line Height, Letter spacing, and Letter case. Here you can’t get the option to set the font size.
When it comes to customizing the H1 to H5 heading separately the only extra option you’ll get is the Font size and all the other options are the same.
4. Captions & Buttons
For the Caption and Button section, all the options are the same such as Font Family, Font Size, Appearance, and Line Height.
2. Colors
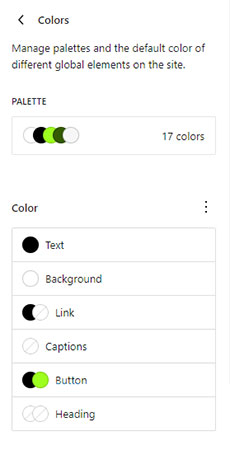
Let’s talk about the Colors, when you click on them you’ll see the options like the below image. Here under Palette, you’ll get 17 colors according to the Style you have selected but you can change that color as per your design.
Apart from this, under Colors, you can customize the colors for the entire site’s Text color, Background color, Link color, Captions color, Button color, and Heading color.
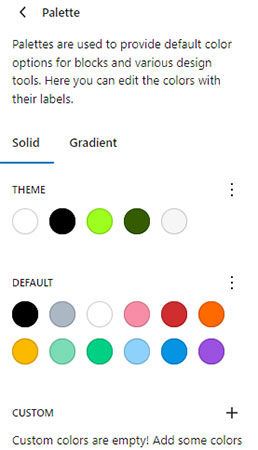
Let’s explore the Palette section, when you click on the Palette you can see all the 17 color options which are selected as per the Style you have chosen. Here you can modify the colors according to your design requirements. On top of that, if you want to add more colors then it allows you to do that by clicking on the + icon beside the Custom.
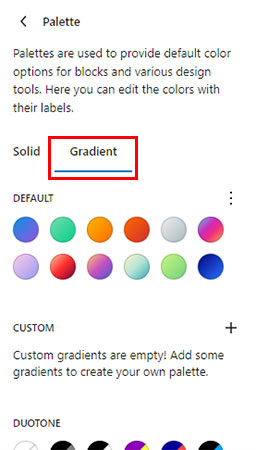
What’s more, it also has by default Gradient and Duotone colors that you can see by clicking on the Gradient tab beside the Solid tab. Also, if you want more Gradient colors then it allows you to do that by clicking on the Custom.
3. Layout – Customize Layout Width & Spacing
Coming to the Layout, here under the layout section, you’ll get the option to customize the Dimensions (Content Area Width), Padding, and Block Spacing.
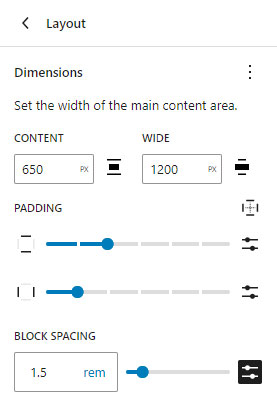
Dimensions
After seeing the above image, many of you might have a question in your mind that is what is Content and Wide width? So, here I clear that doubt, here you can set two widths for your content area as per your design and use it wherever you need it.
In the above image, you can see that under the Content – 650 px is mentioned and under the Wide – 1200 px width is mentioned and this is the default size that comes with this theme. You can modify that, as per your design requirement.
Still, many of you might be confused about how it works, so I’ll clear that doubt on the Template section because after setting the width here we can use that while we are creating a layout for a page and post.
Padding
Talking about the Padding, here you can see that you have only two options to set padding and that is for top-bottom and left-right.
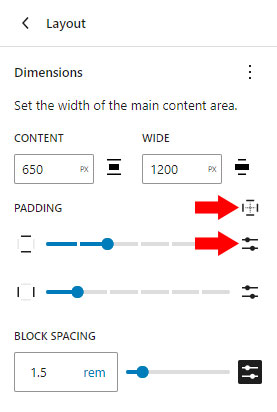
To customize each side of the padding you need to click on the icon beside the Padding which is shown in the below image. Once you click on that, you’ll see a few options, and from that, you have to click on Custom, that’s it now you can see each side of the options.
One more thing, to add a custom padding value you need to click on the icon to customize and add the value which you want.
3. Templates – Customize The Templates
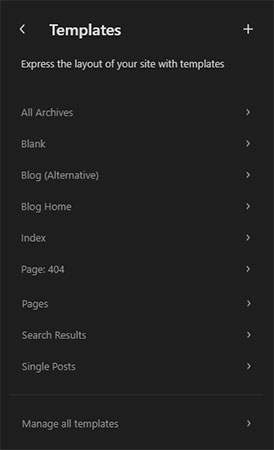
Speaking about the Templates, this is one of the important part for any of the themes. To access the Template, need to go to Appearance -> Editor -> Templates.
As a WordPress user, you may know what a is template and what is the use of that. So, basically, it works the same as the previous WordPress themes but the main difference is that it works on blocks and we can customize it by just drag and drop. I know you all are using this for the first time and you don’t know how to customize the template but don’t worry here I’ll teach you.
In the below image, you can see all the templates that you’ll get and customize any of the templates that you want by simply clicking on them.
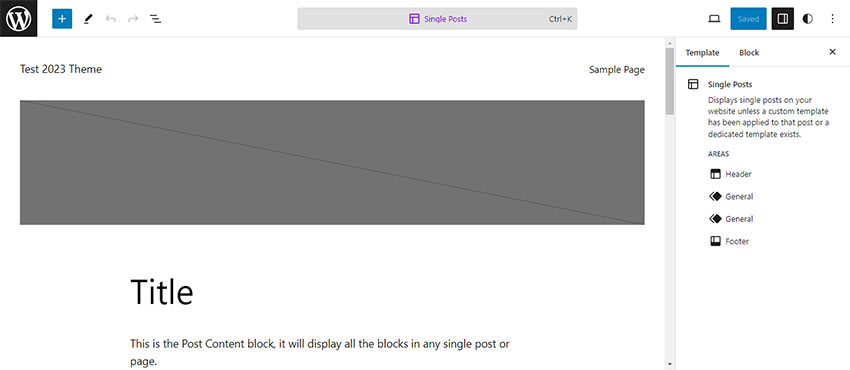
Let’s take an example, here I am selecting the Single Posts template where the Title is below the featured image that you can see in the below image of this template. But I want to show the title at the above of the featured image.
So, to do that, we need to edit that template, just click on the edit icon or simply click on the Single post preview. Once you click on that, you’ll see the screen like the below image.
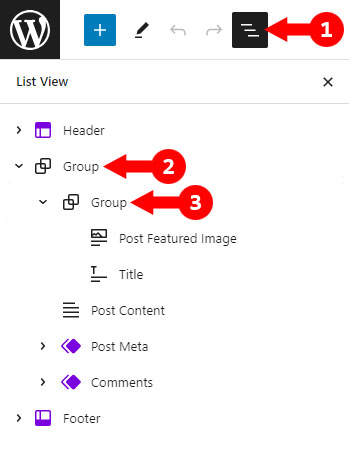
Okay, so now to edit this template you need to click on the icon, and the section will appear on the left side just like the below image. Once it opens, you need to click on the Group as per the image I have mentioned.
After all the sections open you will see the Featured Image and Title and now what we’ll do is just drag the Title on the above Featured Image, that’s it. So, like this, you can easily customize the templates by just drag and drop without touching the code according to your design needs.
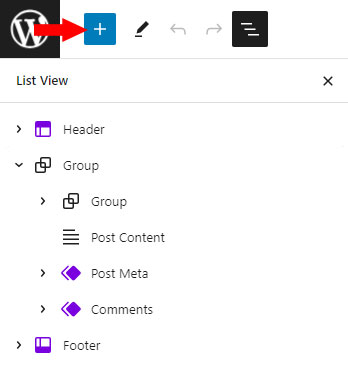
If you want to add anything to this template, simply click on the + icon to add what you want and place that section by just drag and drop where you want to show.
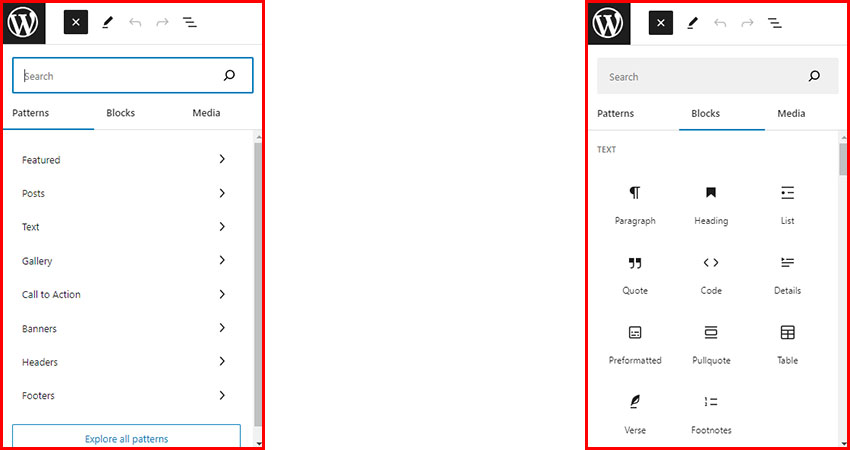
Once you click on that, you’ll see the options like the image below such as Patterns, Blocks, and Media. Under the Patterns, you’ll get preset design options for Posts, Text, Gallery, Header, Footer, etc., which you can see in the image.
Apart from this, if we move toward the Blocks then here you’ll get options to add Paragraph, Headings, Lists, Buttons, Columns, Group, and much more.
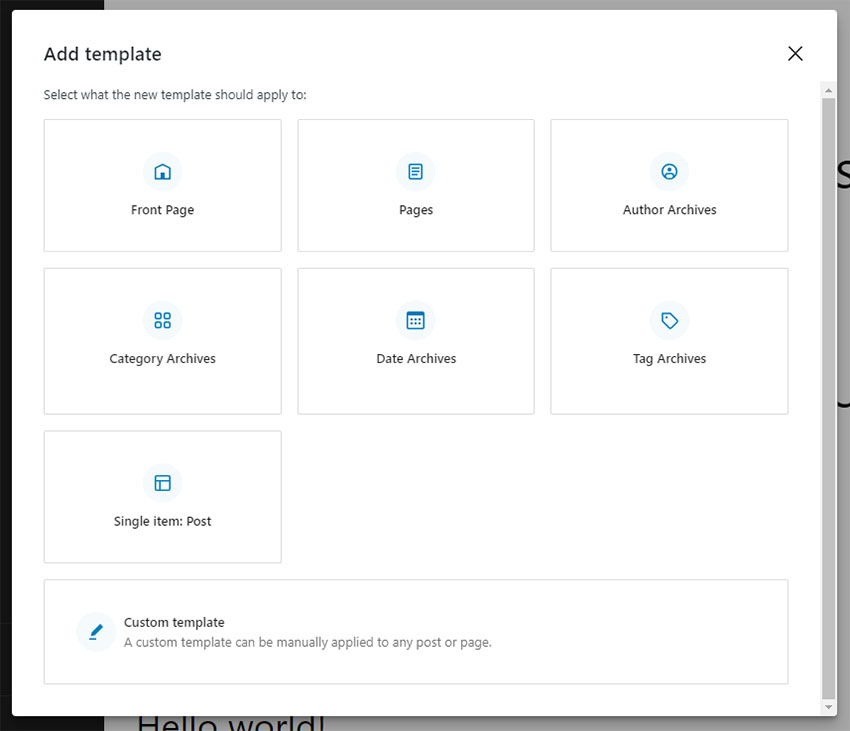
Wait, a question arises regarding the template, what if I want to add a custom template how do I do that? So, to do that, simply click on the + icon beside the Templates heading. Once you click on that, you’ll get a number of options to choose the template design and if none of the options suits you then click on the Custom Template and create according to your needs.
4. Patterns – Customize Header, Footer & Create Sidebar
Last but not least, well, the Patterns is the new option which comes with this theme and all of you might be thinking what is the use of this? So, here is the answer, Patterns allow you to customize the Header, and Footer and also give the option to Create a Sidebar too.
To access the Patterns, need to go to Appearance -> Editor -> Patterns. Once you reached on the Patterns, you’ll see the options like below image. Once you reach the Patterns, you’ll see the options like the below image. Here I’ll explain to you how to customize the header and footer. And also how to create and add a Sidebar to this theme template.
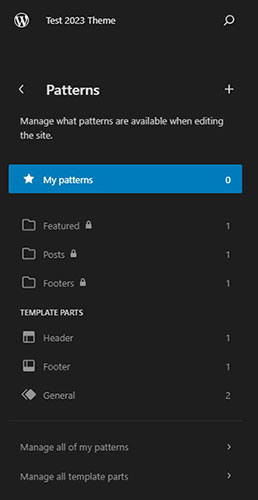
1. Header – Customize The Header
To customize the Header, click on the Header from these options, and then it’ll show you the Header option on the right side of the screen and again you need to click on that. On the next screen, simply click on the edit icon or on the right side screen.
Finally, your screen will look like the below image.
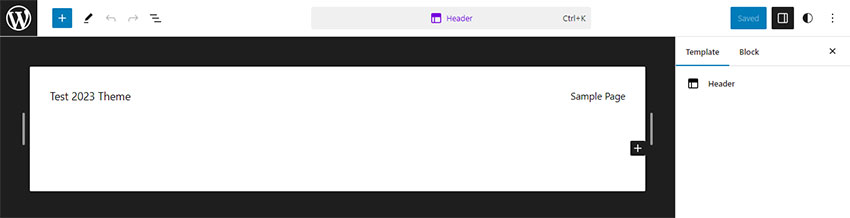
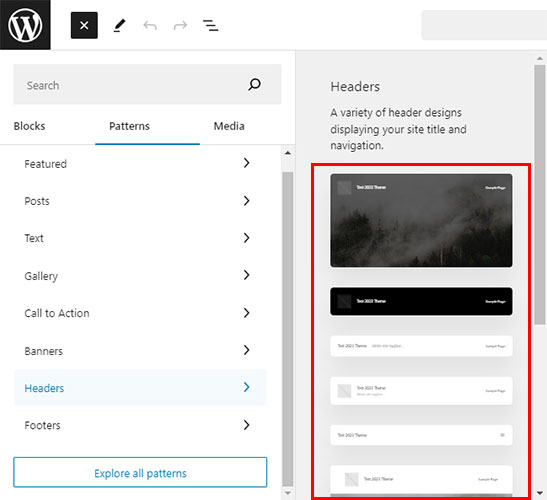
Firstly, your header looks like the above image, if you want your header like this then ok but if not then this theme has a few preset designs for the header. So, to see that, click on the + icon then on the Patterns and then find Headers.
Once you click on the Headers, you’ll get to see all the preset Header designs just like the below image, and if any of the designs are suitable for you then simply click on that option and it will automatically replace the previous header.
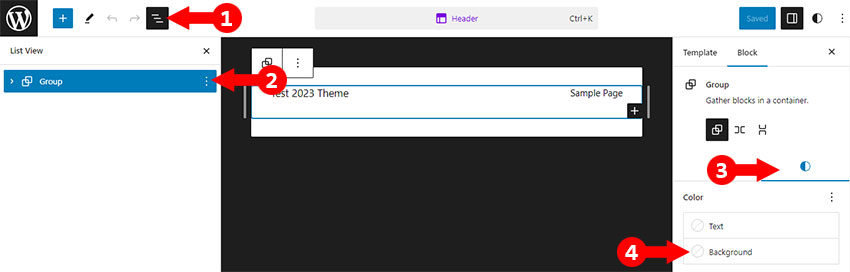
Well, here I have not changed the header design and I have kept that only. Now, if you want to change the background color of the Header then click on the List view -> Group -> Styles. Here you can see the Background option just tap on that and it will allow you to choose the color.
Apart from the BG color, you’ll also get the option to modify the header’s Font Family, Font size, Line height, Padding, Margin, Block spacing, and Min height.
By looking at this header many of you might be thinking about how to add a logo?
Actually, adding a logo to this theme is easy, what you have to do is simply click on the three lines to see a List View then click on Group and Row to expand it, and then the Site title. Once you do that click on + icon, and search Logo that’s it, you’ll see the option – Site Logo just click on that. Once it’s added in the header, simply click on that to add your logo.
After clicking on that, it will be added to the header beside the Site title. However, if you don’t want the Site title then simply remove it. After adding the logo, if you want to set the logo width according to your header design then it allows you to do that.
Still, if you don’t understand how to do that, don’t worry simply look at the below video.
After adding the logo, another thing that comes to mind that is how to customize the menu? Well, as I have said in the Navigation section we will see the menu customization in the Patterns section so here we’ll discuss that.
To customize the menu, you need to click on the navigation menu and you’ll see three tabs appear on the right side and that is List view, Settings, and Styles.
1. List View
Under this section, you can add, edit, and create a new menu. To create a new menu, you have to click on the three dots and you’ll see the option for Create new menu, simply click on that and your new menu is ready to use.
2. Settings
Here you’ll get the option to justify the menu’s position like left, right, and center. On top of that, if your design has a vertical menu then you can also do that with just a single click as it has an option under Orientation.
Regarding the mobile menu, they offer two options for the mobile menu icon button and also allow you to choose to show the menu as an overlay or not.
3. Styles
Finally, we come to the menu styling options, here you’ll able to customize the menu’s Text color, Background color, Font Size, Font Family, Block spacing, etc.
2. Footer – Customize The Footer
Well, the steps to customize the Footer are also the same as the Header. To access the Footer you need to go to the Appearance -> Editor -> Patterns -> Footer.
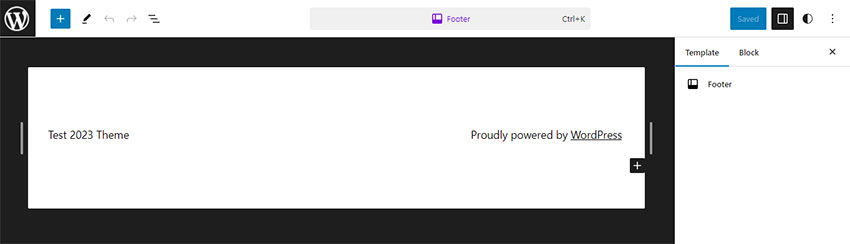
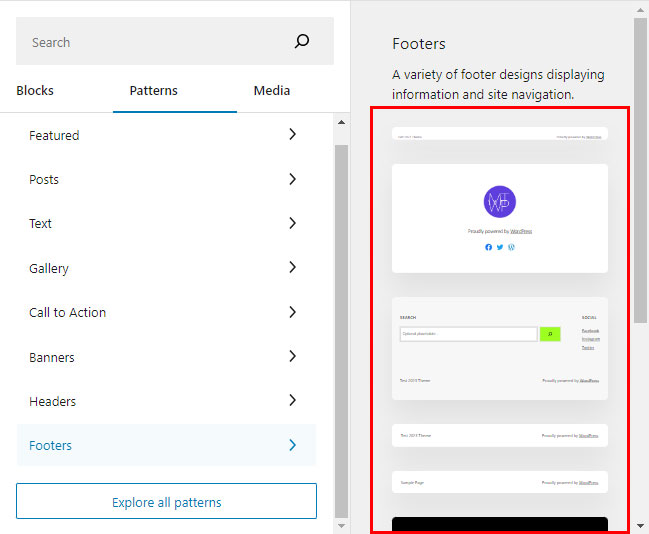
Once the Footer section is open, the first thing you have to decide that this footer design is perfect for your design. If not, then simply click on the + icon and go to the Patterns and click on the Footer. Now, you need to choose the one from the variety of designs which is suitable according to your design.
Still, if none of them suit your design then simply modify the default footer design.
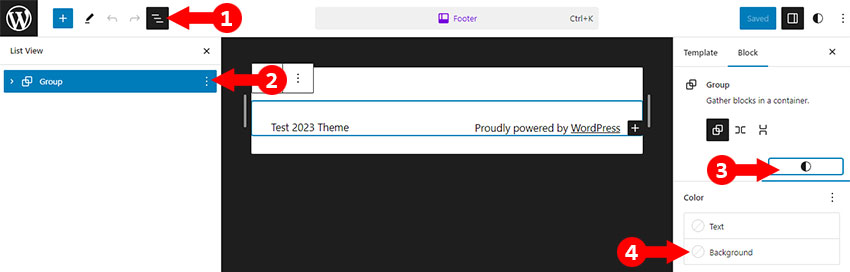
To customize the footer, the steps are almost the same just like the header, go to the List view -> Group -> Styles. Under the Styles tab, you can see the Background option and by clicking on that you can choose the color as per your design requirement.
Apart from this, you can also be able to change the footer’s Font Family, Font size, Line height, Padding, Margin, Block spacing, Min height, and border.
3. Sidebar – Create Sidebar
To create a sidebar, go to the Appearance -> Editor -> Patterns. Once the Patterns section is open you need to click on the + icon and select Create template part option.
After clicking on that, a pop-up will open where you need to add your sidebar name like I have added Sidebar, and click on the Create button. Now, your sidebar is ready, you have to add the things that you want to show in the sidebar.
Okay, so now the sidebar is ready but many of you might be wondering how to add that sidebar to the template? Well, here I will show you how to do and for that, I’ll add the sidebar on the Single Posts template.
Like the above video, you can add a sidebar to any template.
Final Thoughts
Finally, we are reached at the end of this guide of twenty twenty-three WordPress theme. Here I have tried my best to cover everything that’ll helps the user who is using it for the first time.
I hope that, this guide has helped you on how to use this WordPress twenty twenty-three theme. Still, if I have missed anything here then tell me via commenting below so it can help you to other users.
If this guide has really helped you then share it with your friends on your social media profile.