When I first started building WordPress websites, I didn’t pay much attention to images. I assumed that as long as they looked good, everything else would follow. That assumption cost me. My pages were loading slowly, visitors were bouncing, and Google wasn’t happy either. After helping countless clients, I realized that images are often the single biggest factor slowing down a website, especially for bloggers, eCommerce stores, and portfolios.
Over the years, I’ve developed a workflow that lets me optimize images without losing a single bit of quality, while making sure my pages load lightning fast. In this tutorial, I’ll share exactly what I do — the same steps I use on my websites and client projects.
Whether you’re running a blog, an online store, or a portfolio site, this guide will give you the tools, tips, and plugins to compress, optimize, and serve images in the best way possible.
Why Image Optimization Is More Important Than Ever
When I first learned about website speed, I was shocked by the numbers. Just a single unoptimized image can take hundreds of kilobytes or even megabytes — and if your page has multiple images, it adds up quickly. I remember a client’s portfolio page with high-resolution photos straight from a DSLR camera. The images looked stunning, but the page took over 6 seconds to load. Visitors weren’t sticking around.
Optimized images make a massive difference. Smaller files mean faster page loads, which in turn improves SEO, user experience, and conversion rates. Google has been very clear: site speed affects search rankings, especially for Core Web Vitals. Over the years, I’ve seen clients increase organic traffic by 20–30% just by properly optimizing images. On top of that, pages load faster on mobile networks, which is crucial since most users browse on their phones.
Images are also the heaviest elements on a page after videos. If you skip optimization, your site might look fine visually, but performance metrics will suffer — and visitors won’t stick around long enough to enjoy your content.
Step 1: Choosing the Right Image Format
One of the first lessons I learned is that format matters more than people realize. JPEG, PNG, GIF — each has its strengths and weaknesses, and using the wrong one can unnecessarily increase file size.
I usually follow this rule:
- JPEG for photos and complex images with lots of colors. It compresses well and keeps the quality decent.
- PNG for images that need transparency or crisp lines, like logos and icons. PNG uses lossless compression, so you won’t lose any detail.
- WebP for almost everything in 2025. It combines small file sizes with excellent quality, and modern browsers support it.
I’ve also experimented with AVIF, which can reduce file size even more than WebP. However, browser support is still limited, so I use it selectively. If you use plugins like ShortPixel or Imagify, they can automatically convert your images to WebP or AVIF, which I highly recommend.
Choosing the right format might feel like a small detail, but it can reduce image sizes by 20–40% without touching compression settings. That’s a huge win for page speed.
Step 2: Resizing Images Before Uploading
When I first started, I would upload images straight from my camera or Canva, often 4000–5000 pixels wide. WordPress would then generate multiple sizes, but the full-size image still weighed several megabytes. Needless to say, this slowed down everything.
Now, I always resize images before uploading. For blog posts, I usually keep featured images around 1200 x 675 pixels. Thumbnails are smaller, around 300 x 300 pixels. Hero banners might go up to 1920 x 1080 pixels. WooCommerce product images are usually 800 x 800 pixels. These dimensions are more than enough for web display while drastically reducing file size.
I use Canva for quick resizing and Pixlr for batch resizing when dealing with many images at once. Resizing before upload also saves server storage, which is critical for sites with lots of media.
Step 3: Compressing Images Without Losing Quality
Compression is where the real magic happens. I’ve learned to balance small file sizes with high visual fidelity. There are two types of compression:
- Lossy: Slight quality loss but much smaller files. Perfect for blog posts, eCommerce, and social media images.
- Lossless: Keeps every detail intact but doesn’t shrink the file as much. Good for logos or images with text.
I usually use a combination of both. My favorite tools are TinyPNG, Squoosh, and JPEGmini. TinyPNG has been my go-to for years because it’s simple and works reliably. Squoosh is fantastic for visual previews, letting you see exactly how compression affects quality.
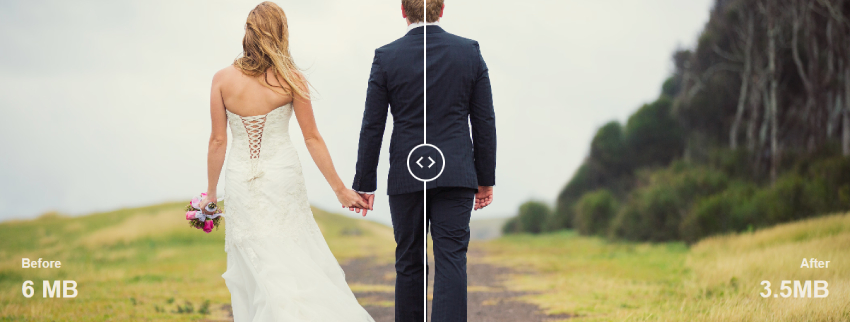
For batch work, I sometimes use Photoshop’s Export for Web function. It’s perfect for fine-tuning compression levels while keeping an eye on visual quality. The goal is to get most images under 200 KB, banners under 500 KB, and product images under 300 KB, without making them look blurry.
Step 4: Automating Optimization With Plugins
As your WordPress site grows, manually compressing and resizing every image can quickly become a huge time sink. That’s why image optimization plugins are a game-changer. They not only compress images automatically when you upload them, but many also convert formats, resize large images, serve WebP versions, and even integrate with CDNs. Over the years, I’ve tested almost every plugin on the market, and here’s what I’ve found works best.
1. Smush
Smush is one of the most popular image optimization plugins in the WordPress ecosystem. I’ve used it on multiple client sites, especially for multi-author blogs where many contributors upload images daily.
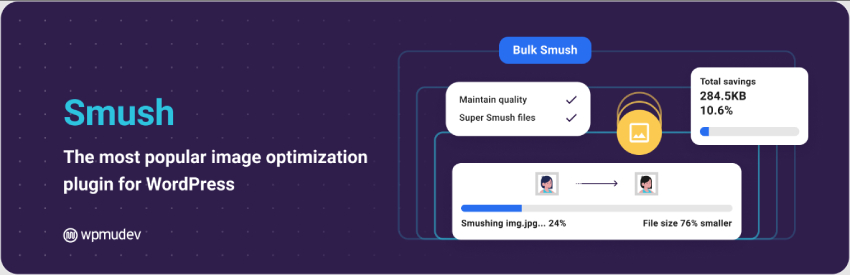
Key Features:
- Automatic image compression on upload
- Bulk optimization for existing media libraries
- Lazy loading for images and iframes
- Resize oversized images on the fly
- Convert to WebP format
Why I Like It:
Smush is beginner-friendly. You don’t need to understand compression algorithms or formats; it handles everything automatically. It also includes lazy loading, which makes pages load faster without additional plugins.
Considerations:
- The free version has a 5 MB limit per image.
- WebP conversion requires the pro version.
I usually recommend Smush for small to medium blogs where contributors may not know how to optimize images manually. It’s like having a smart assistant automatically keeping your media library lean.
2. ShortPixel
ShortPixel is my go-to plugin for high-traffic or eCommerce sites. I first started using it when optimizing WooCommerce product catalogs, and it drastically reduced load times without any visible quality loss.
Key Features:
- Lossy, glossy, and lossless compression modes
- Automatic WebP conversion
- Bulk optimization for all existing images
- Supports PDF compression
- Cloud-based processing to save server resources
Why I Like It:
ShortPixel’s compression is aggressive yet safe. I’ve optimized thousands of images with almost no visual difference. The cloud-based processing also keeps my server from slowing down, which is essential for large sites.
Considerations:
- Free plan is limited to 100 images per month
- You need to purchase credits for larger media libraries
ShortPixel is perfect for eCommerce, portfolio sites, and professional blogs where page speed directly affects conversions and SEO.
3. Imagify
Imagify, created by the team behind WP Rocket, is another plugin I often use, especially on sites where I already have WP Rocket for caching. The integration is seamless, and the interface is intuitive.
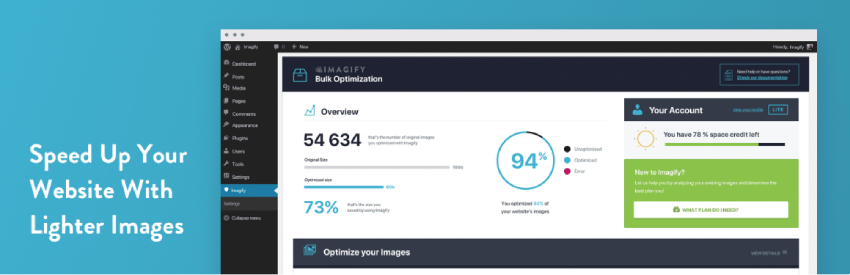
Key Features:
- Automatic image compression on upload
- Lossy, ultra, and normal compression modes
- WebP conversion for faster loading
- Bulk optimization tool
- Integration with WP Rocket
Why I Like It:
Imagify is particularly effective if you’re already in the WP Rocket ecosystem. I’ve found it slightly more user-friendly than ShortPixel for beginners, and the ultra compression mode can reduce file sizes without a noticeable drop in quality.
Considerations:
- Free plan is limited to 25 MB per month
- Some advanced settings require the paid plan
I recommend Imagify for agencies and small businesses who want automated optimization and are already using WP Rocket. It’s a smooth combo that keeps your site lean and fast.
4. Optimole
Optimole is a cloud-based solution that takes optimization a step further. Unlike traditional plugins, it automatically serves device-specific images based on screen resolution, making it ideal for mobile-first sites.
Key Features:
- Real-time image optimization and resizing
- WebP and AVIF conversion
- Device-based image serving
- Built-in CDN for faster delivery
- Automatic lazy loading
Why I Like It:
I love Optimole for high-traffic, international websites. The plugin automatically detects the visitor’s device and serves the optimal image size, which saves bandwidth and improves load times drastically. Plus, the built-in CDN eliminates the need for an extra service.
Considerations:
- Free plan limited to 5,000 visits/month
- Some advanced features are behind paid plans
Optimole is perfect for photography websites, travel blogs, and eCommerce sites where high-quality images must load quickly across all devices.
5. EWWW Image Optimizer
EWWW Image Optimizer is a versatile plugin I use when I need full control over compression settings. Unlike some plugins that process everything in the cloud, EWWW can compress locally on your server, which can be faster for some hosting environments.

Key Features:
- Lossy and lossless compression
- WebP conversion
- Bulk optimization
- Convert existing images to next-gen formats
- Optional CDN integration
Why I Like It:
EWWW is great for users who want granular control. I often use it for sites with custom image requirements, like design portfolios or client galleries. The option to compress images locally gives more flexibility for large websites.
Considerations:
- Cloud-based optimizations require a subscription
- Interface is slightly less beginner-friendly
EWWW is ideal for developers and advanced users who want full control over every aspect of image optimization.
6. Smush vs ShortPixel vs Imagify vs Optimole vs EWWW
Over the years, I’ve tested all five extensively. Here’s a quick personal insight:
- Smush: Beginner-friendly, good for blogs and multi-author sites.
- ShortPixel: Perfect for aggressive compression on large or eCommerce sites.
- Imagify: Smooth integration with WP Rocket, beginner-friendly, great for small businesses.
- Optimole: Device-specific optimization, best for international and high-traffic sites.
- EWWW: Advanced control, developer-friendly, good for portfolios and custom setups.
For most sites, choosing just one plugin is enough. I avoid running multiple image optimization plugins simultaneously, as it can cause conflicts or degrade image quality.
Step 5: Lazy Loading Images
Lazy loading is one of my favorite tricks. Instead of loading all images at once, the browser only loads images as the visitor scrolls down the page. This dramatically reduces initial page load times and improves Core Web Vitals.
WordPress has lazy loading built-in since version 5.5, but I sometimes use a3 Lazy Load or WP Rocket’s lazy load feature for more control. Lazy loading works wonders for pages with lots of images, like portfolios, eCommerce catalogs, and long-form blog posts.
Step 6: Using a CDN for Fast Delivery
Even optimized images can feel slow if your server is far from the visitor. That’s where a Content Delivery Network (CDN) comes in. CDNs store your images on multiple servers worldwide and serve them from the nearest location.
I’ve tested several CDNs, and my top picks are:
- Cloudflare: Free, global, and secure.
- Bunny.net: Affordable and super fast.
- Jetpack Site Accelerator: Beginner-friendly and automatically optimizes images.
Combining a CDN with WebP images and lazy loading can reduce load times by over 70%. On some client sites, the difference was night and day — pages went from 6+ seconds to under 2 seconds.
Step 7: Testing Your Optimizations
After optimizing, I always test my sites using Google PageSpeed Insights, GTmetrix, and WebPageTest.org. These tools tell me if images are still oversized or if any optimizations are missing.
I focus on metrics like Largest Contentful Paint (LCP) and Total Blocking Time (TBT). Proper image optimization usually gives a visible improvement in LCP, which is critical for SEO and user experience.
Step 8: My Personal Workflow
Here’s my exact workflow for every image I upload:
- Design or download the image.
- Resize to appropriate dimensions using Canva or Photoshop.
- Compress it with TinyPNG or Squoosh.
- Upload to WordPress with a plugin like ShortPixel active.
- Let the plugin convert it to WebP.
- Lazy load and serve through a CDN.
Following this workflow, I’ve seen site speed scores jump by 30–50 points on PageSpeed Insights, and Core Web Vitals improve dramatically.
Frequently Asked Questions
1. Can I optimize images already uploaded?
Yes! Plugins like Smush, ShortPixel, and Imagify offer bulk optimization for existing media libraries.
2. Will image compression reduce quality?
Not if done correctly. Lossy compression reduces file size without noticeable visual difference. Lossless compression keeps everything intact.
3. Should I use multiple image plugins?
No. Stick to one to avoid conflicts and double compression.
4. What’s the ideal size for web images?
Most blog images: under 200 KB. Large hero images: under 500 KB. Always balance file size and quality.
Final Thoughts
Optimizing images isn’t optional anymore — it’s critical. A fast website improves SEO, user experience, and conversions, and images are often the biggest bottleneck. By resizing, compressing, using WebP, lazy loading, and serving via CDN, you can dramatically improve your WordPress site performance without sacrificing quality.
This workflow has saved me hours of frustration and helped my clients’ sites rank higher and convert better. Start with these steps, and your pages will thank you.